Full Report
Welcome to your free report covering the diagnosis, management and treatment options, exercises and equipment that could help in rehabilitation. Scroll down to read more or use the sidebar icons to skip ahead.
Diagnosis
Bone Bruise or Bursitis
On the outside of your hip you have a piece of bone called the trochanter. This piece of bone is part of your thigh bone, the femur, and it used as an anchor point for various muscles. The hip muscles which attach onto here are the gluteus maximus, gluteus medius, gluteus minimus, piriformis, obturator externus, obturator internus and quadratus femoris. Their role is to move your leg outwards into abduction, rotate the leg outwards into external rotation, and also help with keeping the leg and pelvis stable in weight bearing activities such as walking and running. The muscles attach onto the trochanter by tendons. A tendons role is to attach muscle to bone, and help transfer the energy produced by the muscle into movement. These tendons are very strong and adaptable to the load and activity that they are required to perform. The final structure to be aware is a bursa. Bursa are fluid filled sacs and they help provide smooth movements of the tendon across bone, and you have one of these on the outside of your hip on top of the trochanter.
After falling onto the outside or back of your hip one of these structures could be injured, or perhaps a combination of all of them to some extent. How much damage these structures suffered will be dictated by the force of the fall, what you fell onto, your general body type, and any underlying health issues which may be affecting your bone strength.
Ask yourself the following questions. Did the area of pain bruised immediately after the injury, if there is swelling present, is there pain if you touch the bony point on the outside of your hip, and is there pain if you stand on the affected leg for longer than 30 seconds? If you answered 'yes' to at least three you should be assessed in person by your family doctor or physiotherapist. These symptoms would be suggestive of a fracture to the area and the treatment would need a specialist to review where they may send you for an x-ray to confirm if there is any fracture present. If however you did not answer 'yes' to at least three of these questions we can presume you have instead a bone bruise.
A bone bruise is when the bone has been damaged but is still structurally sound, similar to getting a bruise elsewhere on your body. A bursitis is when the bursa on your hip is irritated and most likely swollen, causing you pain. Trying to pinpoint specifically in the early stages which one you have, and you could have both, is difficult but as the treatment is the same in the acute phase it doesn't really matter. As you move through the healing stages it will become clearer if you only have one and at that stage can treat more specifically. It would be reasonable to also presume there is some general soft tissue damage of the muscles surrounding the hip, which would result in some pain and tightness.
Treatment for a bone bruise or bursitis on the outside of your hip is to initially rest the area from any aggravating activities. This may be tough at times because you use your hip muscles with so many daily activities, but by reducing certain activities, or Simply reducing the duration of some daily activities will help settle the initial pain. Any unnecessary and strenuous activities should be stopped in this initial phase, such as running or playing sports. Because you use the muscles which attach onto trochanter with walking and standing, it is almost impossible to completely rest the muscle in this area. But you can reduce the duration of how long you perform these daily tasks which will give the area the best chance on healing. You can still perform exercises which don't aggravate your hip which will ensure the other muscles in your legs and hip remain strong, and will also help promote blood flow to the area and keep the mobility in your hip, both of which will help with your healing process. You then want to slowly build up loading these muscles to return you back to your pre-injury level.
If at the end of Phase 2 after a period of relative rest you are still struggling with daily activities, it would be helpful to be reviewed by your family doctor or physiotherapist to ensure there is nothing underlying which needs further assessment and attention.
The important thing to remember is that bone bruising and bursitis will settle but it requires some patience initially resting, and then slowly building up as your hip heals.
Management
Click each phase heading to see the progression of your management programme.
This phase is normally the first 24-72 hours after the event that has triggered your symptoms and its aim is to settle any swelling and pain whilst maintaining the range of motion and function you have. You may find the steps in this phase not applicable due to the level of movement and pain you have, or you may find only a number of points helpful.

RICE
RICE stands for Rest, Ice, Compression and Elevation. These steps are helpful for when you have an injury in the acute phase to help reduce pain and also with the healing process. With a hip injury it is generally impractical and not particularly beneficial to perform the elevation part of this treatment method.
Rest: You need to reduce the activity level you are performing and let your body have time to heal. The aim here is to pace your activities throughout the day and cut back on anything unnecessary or that particular increases your symptoms.
Ice: This can help reduce the pain you are experiencing and also reduce some of the swelling if you have any. Using some frozen peas wrapped in a damp cloth for 20 minutes will work well here and do this every hour or two. Do not apply the ice directly to your skin, make sure you have a barrier which is preferably damp, and keep an eye out for any ice burns onto the skin. If you notice this stop immediately.
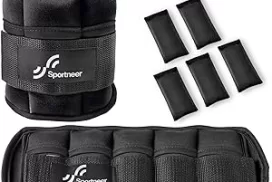
What can be helpful here is having a specifically designed ice pack you can reuse over and over again. You still need to have that damp cloth as a barrier with these packs as well.
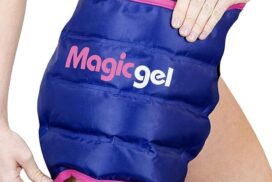
Compression: This relates to the use of the ice being compressed onto the hip region. This can be achieved by simply wrapping a cloth around your joint, but more bespoke equipment offers this ability which would be more comfortable and effective, such as a hip ice pack. You may find this part of the treatment irritable and if this is the case you can simply skip this part.
Medication
In the initial phase the use of over the counter medication may be an option. Medication such as paracetamol and ibuprofen may allow this acute phase to be more manageable. Please consult your family doctor if you have any concerns with this impacting your current medication, or if any medical history may be impacted by the option of including this medication.
Exercises
The aim here is to maintain the hip movement you have, and ensure we keep the muscles and tendons across the front of your hips active.
You may find it helpful to do these exercises in a circuit type fashion, where you do exercise 1 for 1 set, followed by exercise 2 for 1 set, and then restarting.
| Exercise | Frequency | |
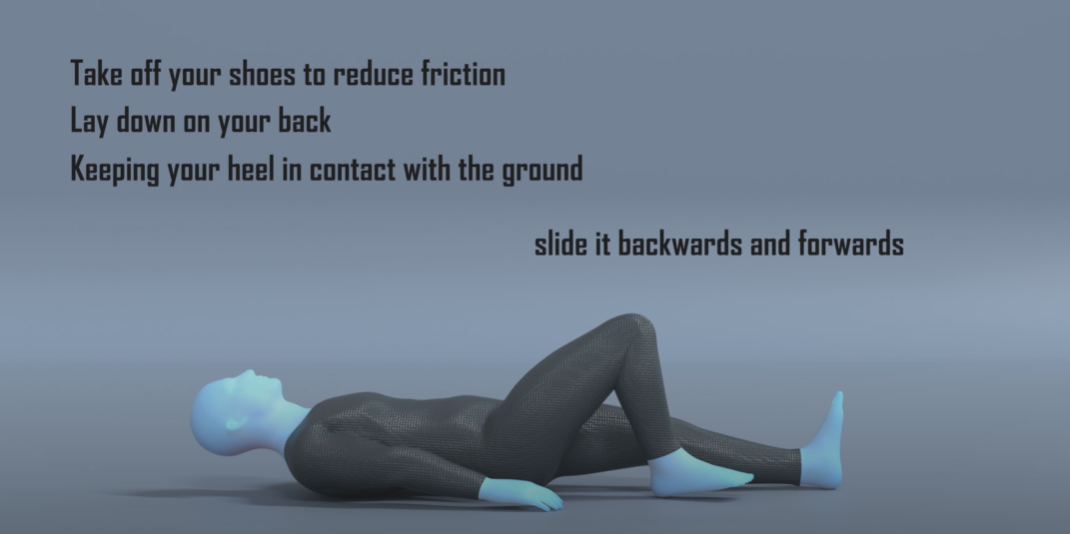
| Heel Slides | 12-15 reps x 2 sets | 3 x daily |
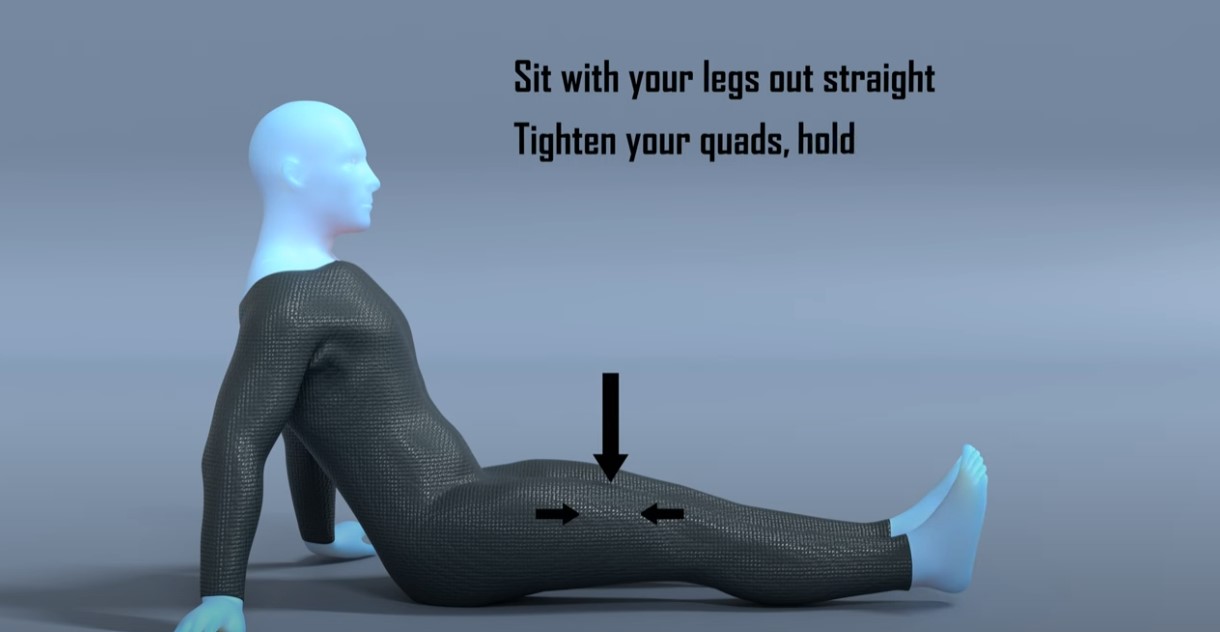
| Static Quads | 10 - 20 seconds x 2 sets | 3 x daily |
Some points to consider with these exercises:
- The heel slides should not be irritable and the focus is just on making sure we keep the hip and knee moving as much as possible. What angle you have your hip at to perform this, and how much you are able to slide your heel really doesn’t matter, the important thing is to move it whatever you can.
- Depending on your level of discomfort you may find the static quads exercise discomforting as it will be activating the tendons across the front of your hips a small amount, in this early phase just focus on doing what you can without aggravating your symptoms any further.
- Try to perform them little and often. Don’t get too focused on duration, sets and frequency. Initially it may be tough to perform the exercise for 10 seconds and 2 sets as it could be discomforting. Just slowly increase how long and how often you do them over the following weeks.
This would be roughly the first 3-6 weeks of your recovery.

Education
The aim here is to maintain the strength of the muscles surrounding your hips whilst we keep as much movement in the hip as possible.
As we mentioned at the start you have many muscles which attach onto the bony landmark on the side of your hip, the trochanter. Their function is to move your leg backwards into extension, out sidewards into abduction, rotate externally, and generally help with hip stability in any weight bearing position such as standing or walking. Because it is impossible to avoid daily activities where these muscles are activated, and therefore putting pressure and load onto this area, we will avoid during this phase any exercises which further activate these muscles.
You can continue any exercises from the previous phase but you may find they have less value as you progress through your rehabilitation, however the heel slides may act as a nice warmup before doing these exercises.
Exercises
These exercises are aiming to increase the strength of the muscles surrounding your hip and hopefully not irritate the hip with the movement produced. If you find any of the exercises too painful try and alter the angle you have your hip when you perform the movement so that it may reduce the irritation. If that hasn’t helped and you find the exercise repeatedly causes a spike in your pain, it may be best to avoid them for now and retry them at a later date.
A good marker of when to progress from this phase is when you can perform these all with no pain and general daily activities are less discomforting. If you continue to get pain with your daily activities with no improvement in symptoms, progressing on to the next stage where the exercises are harder will most likely only increase your symptoms more.
You may find it helpful to perform the exercises in Phase 1 as a warm up before attempting these.
| Exercise | Frequency | |
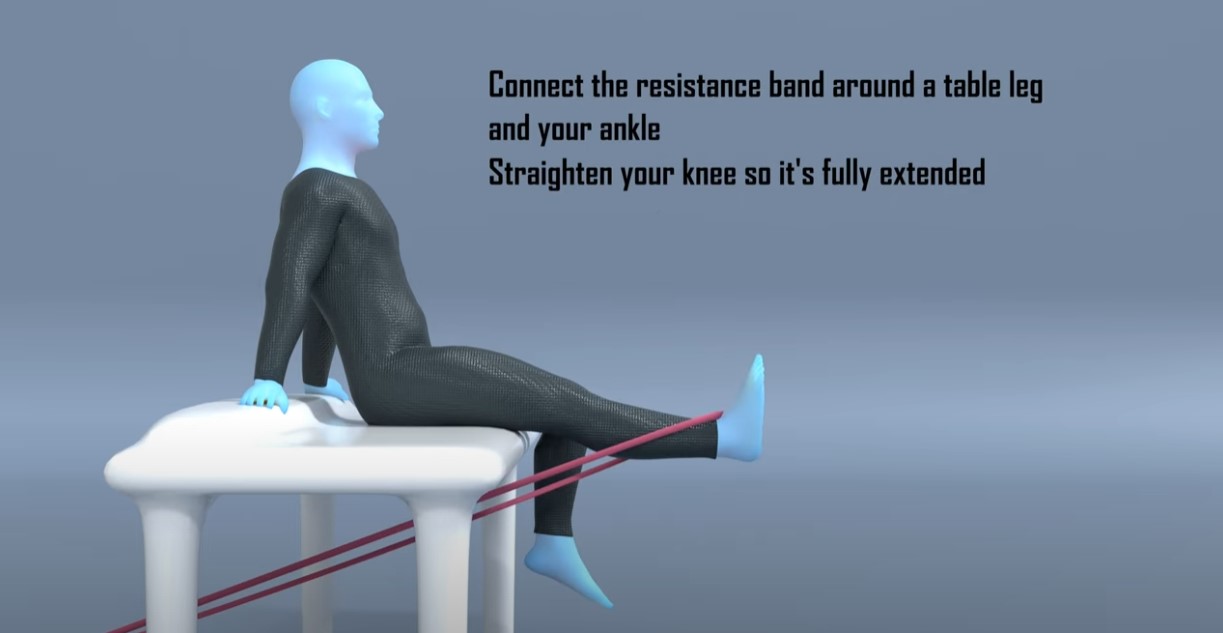
| Resisted Knee Extension | 12-15 reps x 4 sets | 2 x daily |
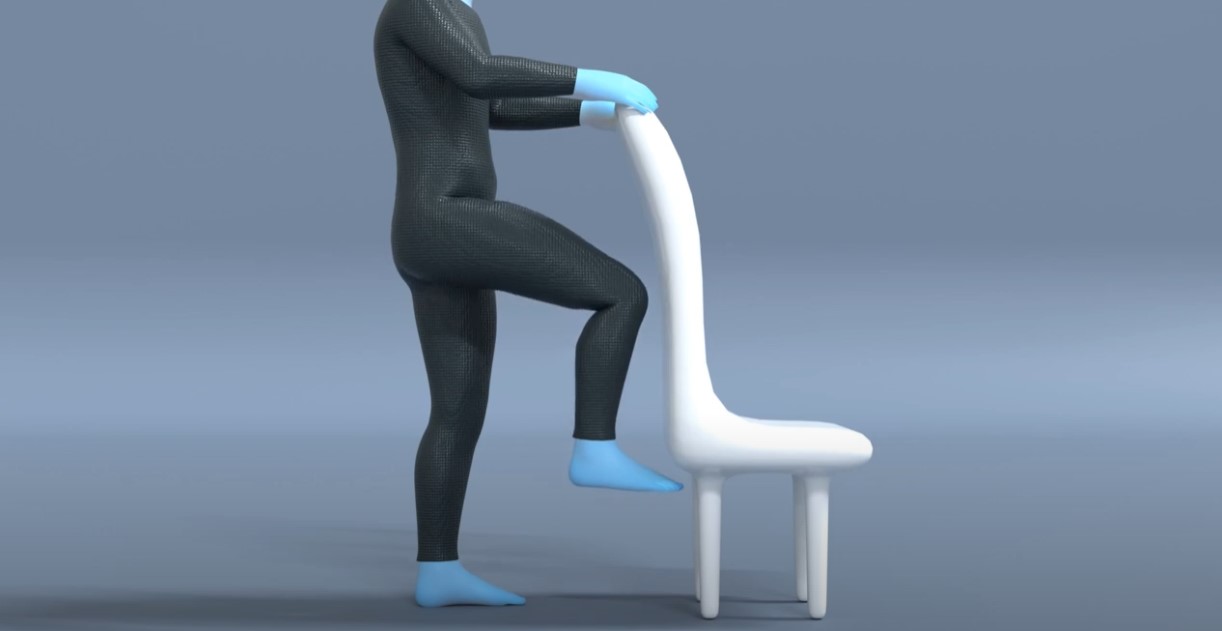
| Hip Flexion in Standing | 12-15 reps x 4 sets | 2 x daily |
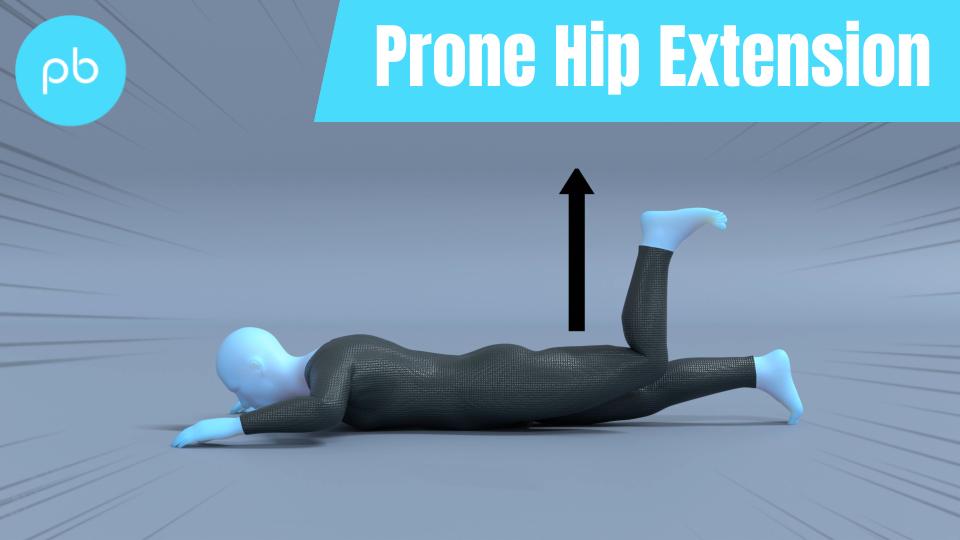
| Prone Hip Extension | 12-15 reps x 4 sets | 2 x daily |
Some things to consider with the exercises:
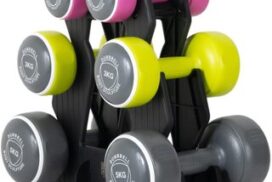
- The exercises in this phase are to maintain the strength levels in the muscles in our hips and legs with some basic strength work.
- The first exercise is aiming to ensure our quad muscles are strong and is a progression from the Static Quads exercise in Phase 1.
- Exercise 2 is not focusing on strengthening our hip flexors but instead making sure we keep the muscles at the back of our hips flexible. I wouldn’t put any weight on your ankles or use resistance bands with this exercise as the aim is to promote hip mobility and move the hip as much as you are comfortable, you don’t want to be limited due to your hip flexor weakness
- The final exercise may be the hardest exercise of this phase. We are aiming to maintain the strength of the muscles on the back of your hips but without causing pain. It can be difficult to perform this movement without aggravating your injury site. If that is the case just wait a couple more days to see if the extra rest makes it easier.
- You may find it helpful to do these exercises in a circuit type fashion, where you do exercise 1 for 1 set, followed by exercise 2 for 1 set, then exercise 3 for 1 set. Make sure you have a rest after exercise 3, of at least 1 minute, before restarting at exercise 1.
Medication
You should expect to see the usage of medication reduced as you move through this phase. If you require medication to get you through the exercises, or immediately afterwards, perhaps you need to reduce the reps or duration of some of the exercises so that it becomes a little easier.
Acupuncture
The evidence for acupuncture is poor in improving healing time for bone bruise or bursitis. It can increase blood flow to the area which can help with the healing process, but so does performing the exercises we have mentioned. There is some evidence of improving pain, so it may be an option if that is your limiting factor and you have tried other options to reduce your pain without success. However, using acupuncture on its own is unlikely to improve symptoms.
Massage
Similar to acupuncture, massage on the muscles in your thigh and hip may help blood flow to the area and offer temporary reduction in tightness to the injury site, however similar effects can be generated with simple movement and the exercises. You should not massage over the injury site on the side of your hip as this will only irritate your symptoms further. You may find this helpful as a treatment option but similar to acupuncture it is unlikely to resolve symptoms on its own.
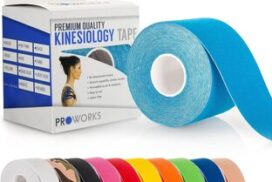
Strapping
Kinesiology strapping is very popular for many musculoskeletal injuries. The idea is that the tape helps support the muscles and tendons at the point of pain, and therefore causes less pain when doing exercises or general daily activities. The evidence for kinesiology strapping is mixed, and because of that some people find it’s really helpful whereas others find it doesn’t offer them much at all.
If you feel you are struggling to progress, or you feel your rehab is a little stagnant, or that general daily activities are still irritable, then it may be helpful to try this.
You can leave the tape on for up to 5-7 days but at any point if it feels hot and itchy take it off straight away. Have a day's rest of no tape before reapplying, and ideally test with a small strip before applying a big amount to you.
This video shows a general strapping method which you may find helpful for pain on the outside of your hip.
It’s likely that used alongside some of the other treatment methods it may offer some relief, but realistically on its own will not help completely alleviate your pain.
Foam Roller
A foam roller is used to offer self massage. They are marketed as a way to get similar results of a massage but without the reliance of a masseuse, making it more practical and cheaper for people to use. They are very popular within the fitness industry and with a lot of professional athletes using them within their warm-up and rehab routines. The idea is that similar to massages they increase blood flow to the area and also help with mobility by reducing muscle tension. Unfortunately the evidence on them having an effect on muscle length is minimal, and any change is short term, and the link that they reduce injury or improve rehab times is simply missing. Again similar to acupuncture and massage, a foam roller can be used alongside an exercise programme to help with symptoms and function, but used on its own will not improve performance. In this example you would be foam rolling the quadricep, adductor and hamstring muscles in the lower leg, do not foam roller over the injury site on the outside of your hip.
Symptoms
During this phase you should start noticing more times in the day when you are pain free, however it is not uncommon for there to be sharp spikes in pain if you are doing a specific activity. This will improve and the activities which cause irritation should become less. If you continue to perform activities which consistently aggravate the outside of your hip, it will continue to cause you pain and perhaps be affecting the healing. You need to alter the activities in some manner that are causing irritation until you have moved further along in your healing where the bursa or trochanter doesn’t get so easily aggravated.
If you are struggling to wean off medication or perform the exercises in this phase it may be helpful to be reviewed by a medical professional to ensure you are on the right path if you haven’t done so already. If they confirm there is no hip pathology of concern, and it is simply a soft tissue strain, then you can continue on the phases in this rehab programme.
In this phase we are looking at between 6 to 12 weeks following the injury or start of your symptoms.
Education
Similar to Phase 2 the timelines here are merely a guideline and may vary. You may find that you are able to start this phase before 6 weeks if the symptoms have settled and you aren’t challenged by the exercises.
A good indication that you are ready to progress onto this phase is that you generally don’t notice your symptoms with daily activities such as walking short distances or standing, and can perform the exercises from Phase 2 with ease.
If following an assessment with your family doctor or physiotherapist they believe there is something else other than bursitis or bone bruising which is the cause for your symptoms, you should follow the advice given by the team responsible for your care. You should be able to continue any exercise from Phase 1 or 2 which is not painful alongside their treatment. If however there was no concern following their assessment, you can continue through onto this phase once the exercises from phase 2 are pain free.
Perhaps you didn’t get any assessment from your family doctor or physiotherapist and over the past few weeks your symptoms have improved. This is very encouraging and perhaps the reduction in activity and some basic mobility exercises may have helped things. You can continue through this programme progressively building up the intensity to the level you need to perform your tasks of choice, however if you regress backwards in terms of function, it may be helpful to be assessed as there could be something underlying limiting your progression beyond a certain intensity level.
The aim of Phase 3 is to start introducing some low level weight bearing exercises to the movements where the range of movement is reduced to a level which hopefully will not increase your pain. We will also be increasing the general intensity of the strength exercises.
You should at this stage be able to perform the exercises from Phase 2 with ease and not reliant on any pain medication to perform daily activities.
Exercises
The focus on Phase 3 is to reintroduce some low level weight bearing exercises and increase the intensity of the strength exercises at the hip.
| Exercise | Frequency | |
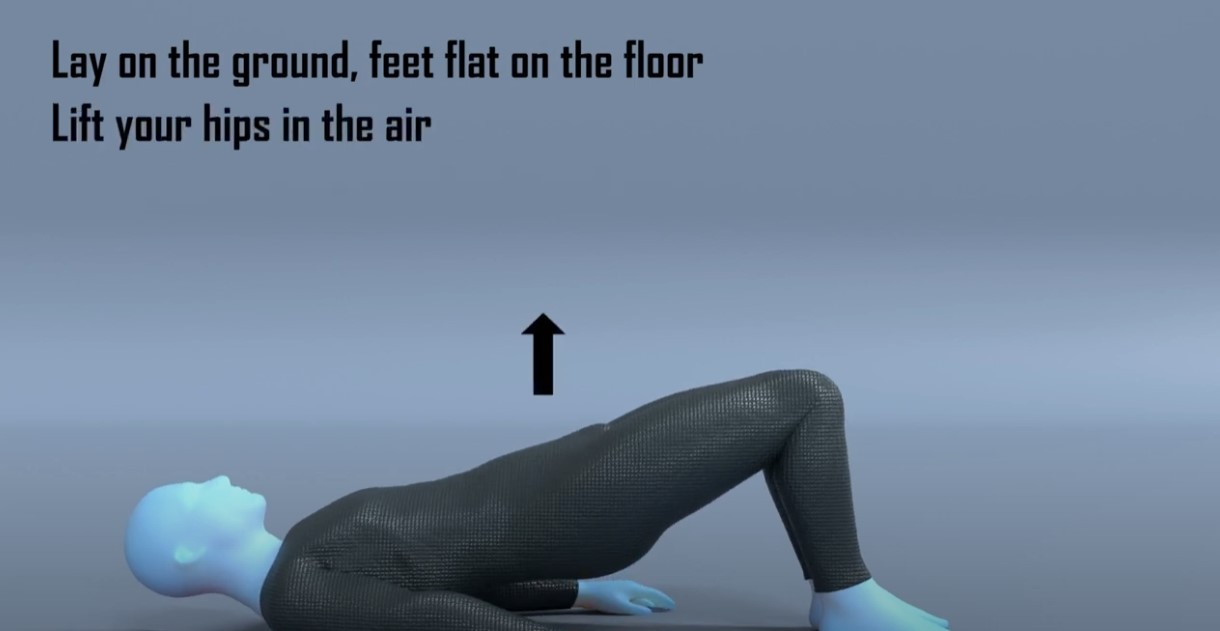
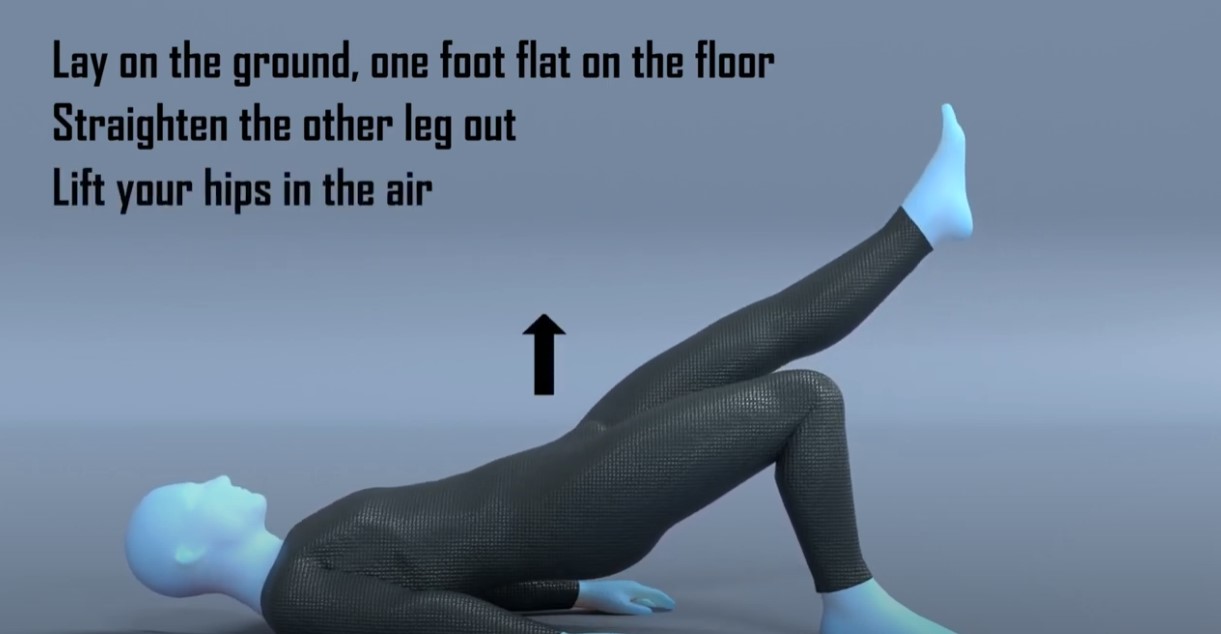
| Double leg hip bridge | 10-15 reps x 4 sets | 2 x daily |
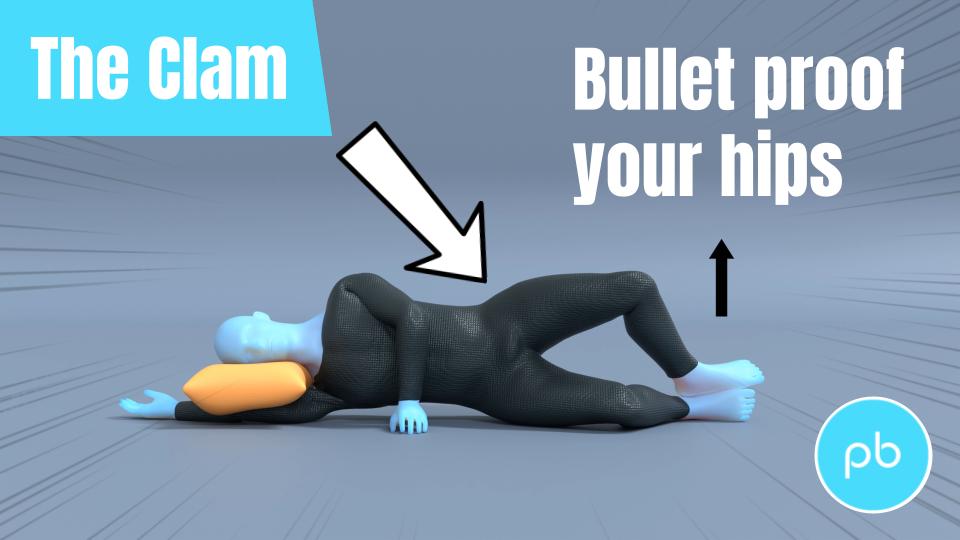
| Clam Exercises | 30-60 seconds x 4 sets | 2 x daily |
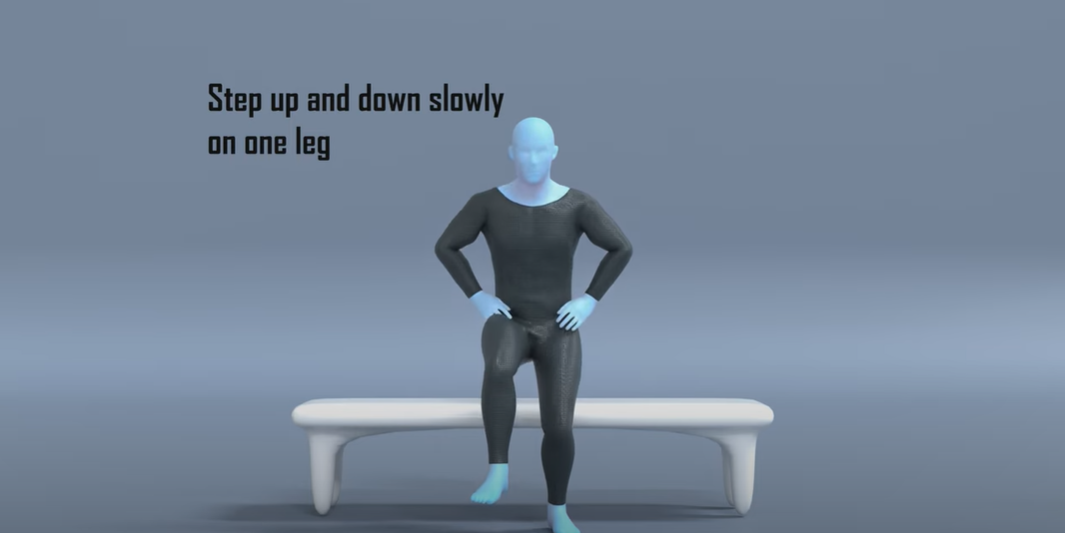
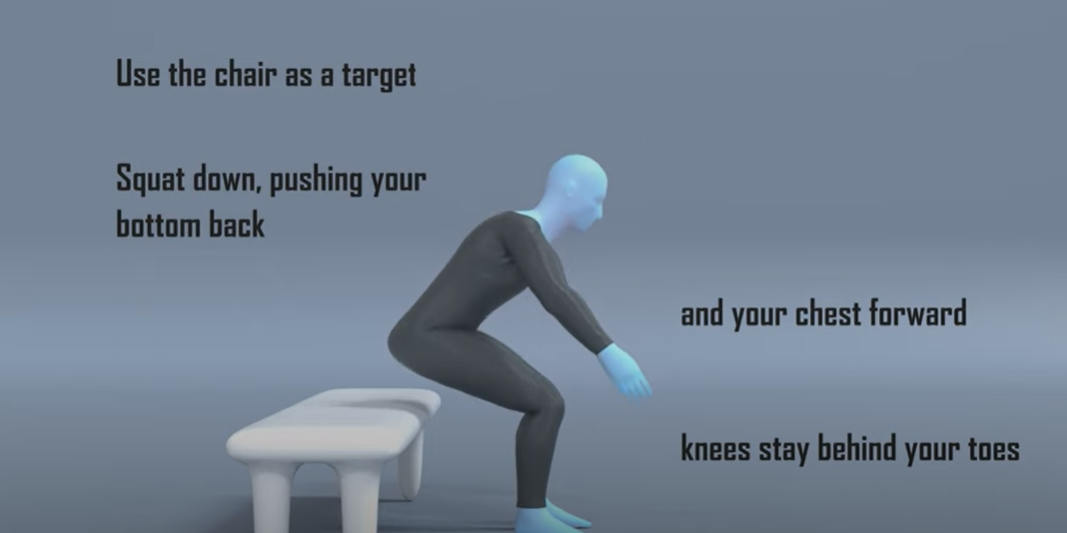
| Sit to stand or Squats | 8-12 reps x 4 sets | 2 x daily |
Some things to consider with the exercises:
- You may find performing the exercises from Phase 2 acts a nice warm up before attempting these exercises which are slightly harder.
- The first exercise is a progression from the Prone Hip Extension exercise from Phase 2 and aims to strengthen the muscles on the back of your hip.
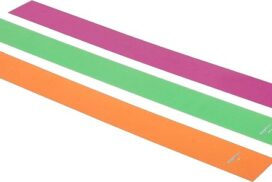
- The second exercise is likely to be the hardest. It is working the muscles on the outside of your hip which connect onto the trochanter. You should start this exercise with no resistance band and simply move your leg. If that is too hard you can put a pillow between your legs and this will reduce the range of motion and potentially reduce the amount of pull of the muscles onto the bone. Once this exercise is easy and causes no discomfort, you can get a resistance band and wrap it around your knees to make this exercise more challenging. Start the exercise trying to achieve 30 seconds, and once you can achieve this for 4 sets increase the duration progressively.
- The sit to stand exercise is easier than the squat exercise. If you struggle with the sit to stand exercise, raise the height from which you perform this movement from, this will make it easier to perform. If your balance is your limiting factor here, you can gently hold onto something to give you some support. Your aim should be to have equal weight bearing on both feet, but it may be the case you need to progress on to this. If you are struggling performing the squat then regress to the sit to stand exercise. If you are able to perform the squat and it eventually gets too easy, you can progress this and hold some weight during the movement.
- You may find it helpful to do these exercises in a circuit type fashion, where you do exercise 1 for 1 set, followed by exercise 2 for 1 set, then exercise 3 for 1 set, and then restarting after a break.
The final phase may not be necessary for everyone, however if after completing phase 3 you are finding you are still not able to complete your activities or sport of choice pain free then it may be best to continue, especially if you need to hop or run.
If you have a desire to return to running or sport then you should continue with this phase.
Here we focus on performing exercises that are more dynamic and to mimic the demands of running, along with a bias onto the single leg. As we introduce impact work into the rehab programme you need to be conservative in these sessions and build up slowly. For the first week performing these exercises follow the rule that you want to leave each session wanting to do more. You do not want to finish the session and be in pain thinking that you have ‘now worked hard enough’. Starting impact work is a big step and generally what most people find the hardest. You want to be patient and not rush things, undoing all of the good work you have done up until this point.
A simple test if you have access to a leg press machine in a gym, is to see what your 1 rep max leg press is and compare it to your other leg. If you don’t normally use this piece of equipment some guidance from a Physical Trainer in the gym would be advised. What you are aiming to see is that your injured leg should be at 90% strength of your non-injured leg. If your injured leg is much below this number it may not have the strength to cope with the demands of running. Another way to test without a specialist kit is doing a single leg sit to stand test, where you count how many single leg sit to stands you can do on the injured side and compare it to the non-injured side. Similarly you want to be at roughly the same amount of reps for each side. Now these two tests are slightly different in that one will test max strength and the other more muscular endurance, but both will offer some insight depending on your access to equipment.
The second test you want to perform is the single leg hip bridge exercise. On the unaffected side initially perform this exercise for 20 reps and then repeat it on the other side. Was there a difference in fatigue or pain? If so it gives a good indication on what you need to work on. If there was no difference, repeat the test but increase the rep range to 30. You ideally want to be at 90% of effort needed to match the reps or 90% of the reps completed before moving onto any return to running or sport.
The exercises in this phase can help address any loss in single leg strength and will also help improve your single leg control, which will be crucial for any return to running or sport.
In this phase we are just continuing the process of increasing the range of the hip with load. By this point you should be able to complete the exercises in phase 3 with no increase in pain.
Exercises
| Exercise | Frequency | |
| Single leg sit to stand | 8-12 reps x 4 sets | 1 x daily |
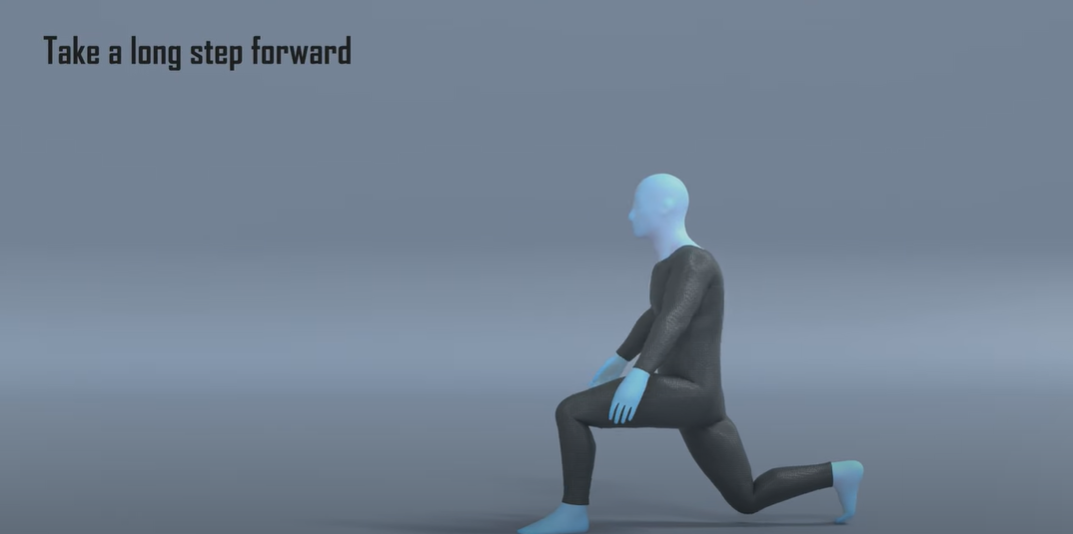
| Walking Lunges | 12-15 reps x 4 sets | 1 x daily |
| Side to side hopping | 30-60 seconds x 4 sets | 1 x daily |
Some things to consider with the exercises:
- Performing the exercises in Phase 3 for one to two rounds may act as a good warm up for these exercises.
- If you struggle with the single leg sit to stand, raise the height from which you perform this movement from, this will make it easier to perform. If your balance is your limiting factor here, you can gently hold onto something to give you some support.
- With the walking lunges you may find it difficult initially performing these at full range or going down to a full depth. Progress the range and depth of this exercise over time as your hip joint will be moving through range with load.
- For exercise 3 there may not be a necessity to perform this movement, and you may not have done any hopping movement for many years. If this is the case you can ignore this exercise and instead focus on the other exercises or include a progression from Phase 3 and do Single Leg Bridging.
- You may find it helpful to do these exercises in a circuit type fashion, where you do exercise 1 for 1 set, have a rest for 1 minute, followed by exercise 2 for 1 set, another rest for 1 minute followed by exercise 3, then a final minutes rest before then restarting.
Return to Sport or Activity
As a general rule, try and aim for two pain-free sessions at a reduced duration or intensity before increasing.
For example, if you normally play 60 minutes of tennis, aim to play for 30 minutes in a non-competitive environment for two non-consecutive days.
Having a day's rest between sessions allows you to have appropriate rest and for your body to repair and become stronger.
Once you have found a duration or intensity you can tolerate with no flare up, aim to increase the next session by 10%. This can seem like a slow and conservative process however the research has shown this is the optimum level of increase to avoid an overuse injury. Increasing duration or intensity by more than 10% significantly increases your chance of injury. As you will have been away from your sport for a number of months, you will have lost some of your fitness conditioning in this time and will need to build this up slowly.
Over time you will be able to slowly return to your pre-injury level of activity without regressing back to any acute flare-up.
Pacing
At this stage you should find you can do more day-to-day activities pain free. The temptation here is to go a bit overboard. A nice reminder to pace activities so that you don’t over do it, and that you spread these activities out as much as possible throughout the day.