General Programme
Welcome to your free, general rehabilitation programme covering management and treatment options, exercises and equipment that could help. Scroll down to read more or use the sidebar icons to skip ahead.
Use our symptom checker for a more tailored rehabilitation programme.
Ankle Pain Management
Click each phase heading to see the progression of your management programme.
This phase is normally the first 24-72 hours from when your ankle pain started. Our aim here is to minimise any ankle swelling that is occurring, control your pain levels, and perform some basic mobility exercise for the ankle.

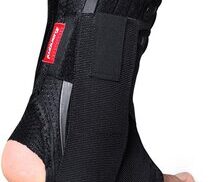
Brace
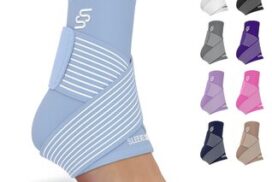
Something which may help reduce the pain and swelling is a simple ankle brace. This can be used when you are trying to walk around and perform any daily activities. When you are resting use this time to take the brace off and get some movement to the ankle if possible.
Initially a basic neoprene ankle brace will be appropriate to offer some support, and perhaps further down the line depending on the level of activity you want to return to, a more supportive brace may be needed. Trying to find the best ankle support for sports injuries will vary depending on your injury and sport of choice.

RICE
RICE stands for Rest, Ice, Compression and Elevation. These steps are helpful for when you have an ankle injury in the acute phase to help reduce pain and assist with the healing process, acting as an easy to apply ankle pain treatment. This is one of those simple home remedies for ankle swelling which most people can try. If you have ankle pain but no swollen ankles, or a bruised ankle but no swelling, you may still find these steps helpful as an ankle pain reliever.
Rest: You need to reduce the activity level you are performing and let your body have time to heal. Once you know more on the diagnosis we can tweak how much rest you really need.
Ice: This can help reduce the pain you are experiencing and also reduce some of the swelling. Using some frozen peas wrapped in a damp cloth for 20 minutes will work well here and do this every hour or two. Do not apply the ice directly to your skin, make sure you have a barrier which is preferably damp, and keep an eye out for any ice burns onto the skin. If you notice this stop immediately.
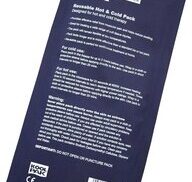
What can be helpful here is having a specifically designed ice pack you can reuse over and over again. You still need to have that damp cloth as a barrier with these packs as well.
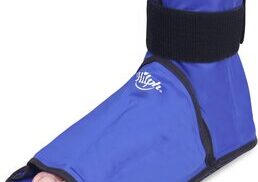
Compression: This relates to the use of the ice being compressed onto the ankle to help with swelling. This can be achieved by simply wrapping a cloth around your ankle joint, but more bespoke equipment offers this ability which would be more comfortable and effective, such as an ankle ice pack.
Elevation: Having your ankle rested on an object and raised by simply lying on the sofa, is an easy way on how to reduce ankle swelling fast. This will help reduce the amount of swelling in the area and may help reduce some of the symptoms you are experiencing. Aim here for a similar time frame as applying ice and go for up to 20 minutes and for your ankle to be at a higher level than your heart. Do not compress and elevate at the same time, as the volume of fluid returning towards your heart may put too much pressure on it. This is one of the easiest swollen ankle treatment options available.
Medication
In the initial phase the use of over the counter medication may be an option to help your painful ankles. Medications such as simple pain relief and anti-inflammatories may allow this acute phase to be more manageable. Please consult your family doctor if you have any concerns with this impacting your current medication, or if any medical history may be impacted by the option of including this medication.
This would be roughly the first 6 weeks of your recovery.

Education
The aim of this phase is to ensure we have full range of ankle movement. As your range improves and your pain reduces you will naturally start using your ankle more which will make sure your strength stays at a decent level. Most people want to know how to cure ankle pain fast. Unfortunately it can sometimes take longer than they expected, but the important thing to remember is to remain patient, and to slowly increase the intensity of your ankle rehabilitation.
During this phase you can continue to practise the principles of RICE we discussed in Phase 1 to help alleviate any ongoing ankle pain you may experience. However as the weeks go on you may find you need to do this less and less as the pain isn’t such a limiting factor.
Towards the middle of this phase you should most likely start weaning from your brace if you decided to use one. This should be done slowly and progressively increasing the time where you don’t wear it throughout the week. It may be sore to start with so perform this in small chunks aiming to increase it progressively over a few weeks. If you find you overdo it simply have a period of rest or return the brace for a short time. It’s quite normal to have small increases in pain as you start reusing your ankle with normal activities and going through an element of ‘trial and error’ on what is appropriate as no two injuries are the same.
A good indicator of when to progress from this phase is when your ankle range of movement on the affected side is similar to your non-affected side.
Exercises
The aim of these exercises is to increase your ankle range of movement and restore its full range, especially helpful if you have stiff ankles. Given the large range of movement available at the joint we have to make sure that all directions are worked on. You may find it helpful to do these exercises in a circuit type fashion, where you do exercise 1 for 1 set, followed by exercise 2 for 1 set, then exercise 3 for 1 set, and then restarting.
| Exercise | Frequency | |
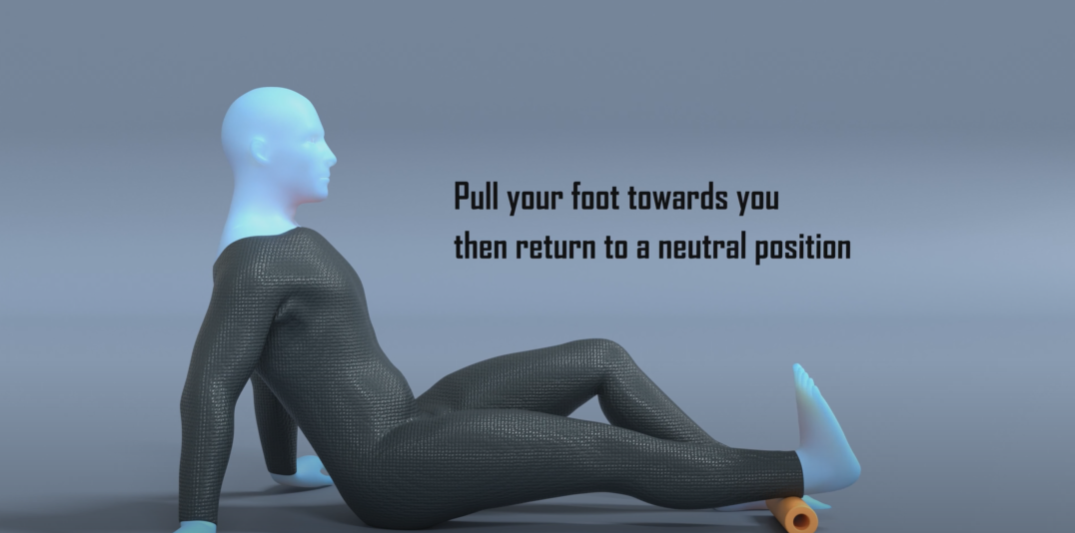
| Knees over toes - loaded or unloaded | 30 seconds x 2 sets | 3 x daily |
| Toe Pointing | 30 seconds x 2 sets | 3 x daily |
| Big Circles | 30 seconds x 2 sets | 3 x daily |
Some points to consider with these exercises:
- There may be some discomfort with these movements but it should become easier over time.
- Try to perform them little and often. Don’t get too focused on duration, sets and frequency. Initially it may be tough to perform the exercise for 30 seconds and 2 sets could be discomforting. Just slowly increase how long and how often you do them over the following weeks.
- If you are using a brace take this off whilst you are doing these exercises.
Pain levels and exercises: mild discomfort is ok during these exercises as long as the pain doesn’t spike above a 5-6/10 and as long as it does not linger for longer than 2-3 hours following the activity.
Cardiovascular exercise: it is also important here to try to maintain good levels of CV fitness in this phase for overall health without putting too much pressure on the affected body part, activities such as gentle swimming or static cycling could be of benefit.
Medication
In this phase you want to continue with any pain medications that are appropriate so that if you are experiencing any pain you are still able to do your rehab exercises, and also maintain a good level of sleep.
In this phase we are looking at between 6 to 12 weeks following the start of your rehab, although you may be able to start this phase earlier if the exercises from Phase 2 are easy to perform and you have a similar range of movement in both ankles.
Education
Similar to Phase 2 the timelines here are merely a guideline and may vary depending on the severity of your ankle pain.
The aim of Phase 3 is to increase the intensity and specificity of the rehab exercises. We are aiming to achieve full range of motion in the ankle and to slowly start introducing gentle strength work through your general daily activities. We are also introducing more weight bearing exercises into the programme which should be more difficult than the previous phase.
You should at this stage not be needing to use a brace for general day-to-day activities. If you are struggling to wean off the brace or still have ankle pain when walking, or ankle pain at night while resting, it may be helpful to be assessed by a physiotherapist to ensure there is no other cause for your symptoms.
You can continue any exercises from the previous phase but you may find they have less value as you progress through your rehabilitation, but may help as a warm up.
You can progress from this phase when you can perform the exercises with ease, and you no longer get any pain with daily activities.
Exercises
| Exercise | Frequency | |
| Calf raises - Double Leg | 15-20 reps x 3 sets | 2 x daily |
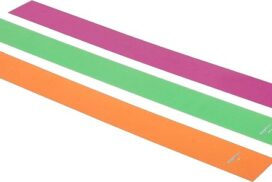
| Resisted Inversion and Eversion with Band | 30 seconds x 3 sets | 2 x daily |
| Single Leg Balance | 30 seconds x 3 sets | 2 x daily |
| Squats or Sit to Stand | 8-10 reps x 3 sets | 2 x daily |
The exercises in this phase are to reintroduce some strength work and to ensure you regain full range of movement in a more practical manner. We have ensured that all movements are included in every direction with a mix of weight bearing and non-weight bearing exercises. We have purposely put the squats or sit to stands last, as this exercise may be the hardest so having a few exercises warm up before may help to complete this exercise. The movements for the first two exercises should be performed with as much range as possible.
If you find with the balance exercise that it is becoming too easy, you can make things harder by performing this on a pillow or folded up towel to make things slightly unstable. However make sure whatever progression you add in that you remain safe throughout. Another progression if the pillow and towel is not challenging enough, is to simply close your eyes. This reduces the information you receive in order to help maintain your balance so your muscles have to work a little harder. Again make sure you are in a safe environment to build up to this level of difficulty. This ankle exercise is particularly helpful if you have weak ankles and is one of the best exercises for ankle sprains.
You may find it helpful to do these exercises in a circuit type fashion, where you do exercise 1 for 1 set, followed by exercise 2 for 1 set, then exercise 3 for 1 set, followed by exercise 4 for 1 set, and then restarting.
Pacing
At this stage you should find you can do more day-to-day activities pain free. The temptation here is to go a bit overboard. A nice reminder to pace activities so that you don’t over do it, and that you spread these activities out as much as possible throughout the day.
Symptoms
During this phase you should start noticing more times in the day when you are pain free, however it is not uncommon for there to be sharp spikes in pain if you are doing a specific activity. This will improve and the activities which cause irritation should become less. If you continue to perform activities which consistently aggravate the ankle, it will continue to cause you pain and perhaps be affecting the end stage of healing.
As your symptoms begin to settle you will notice you are able to perform more general daily activities.
If your ankle pain is not improving with this general ankle programme, you may want to try our free ankle pain symptom checker to get a more customised programme. Our free symptom checker will be able to go through some simple tests to show you the signs of fractured ankle, along with the difference between ankle sprain and fracture. It can help diagnose many ankle pain causes, but importantly when to see a doctor for ankle pain.
This final phase is from the 3 month mark onwards, with changes and progression going on for many months depending on your goal. You may find you can start this Phase sooner than 3 months which is great.
When you start Phase 4 you want to have achieved a full range of movement, or at least 90% compared to the other side, and be able to perform the exercises from Phase 3 with ease.
For the vast majority it may be the case that we need to improve the strength of our ankle for some very specific day-to-day activities related to a hobby or our work. Others may have a specific long term goal in mind, such as returning to running or another lower limb activity.
The main focus on Phase 4 is to increase the strength work in the exercises, and then to introduce either sport or activity specific exercises for your hobby once an initial foundation is made. You may find it helpful to perform the exercises from Phase 3 as a warm up before doing the exercises here.
Exercises
| Exercise | Frequency | |
| Calf Raises - Single leg | 10-20 reps x 4 sets | 1 x daily |
| Hopping on the spot | 20-30 secs x 4 sets | 1 x daily |
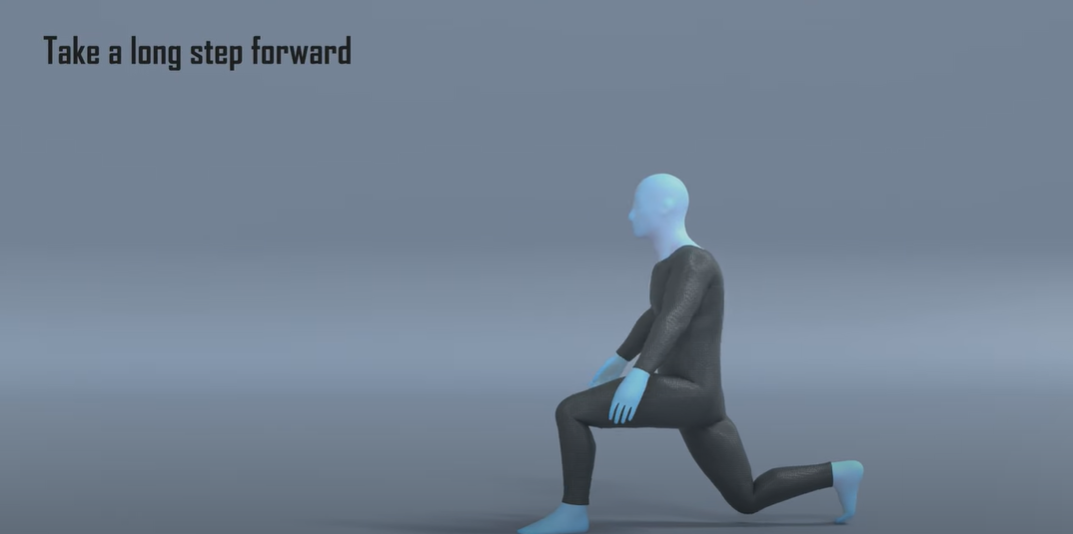
| Walking Lunges | 15-20 reps x 4 sets | 1 x daily |
| Side to Side Hopping | 20-30 secs x 4 sets | 1 x daily |
Some points to consider with the exercises:
- As we introduce more dynamic exercises make sure you give yourself plenty of rest between sets, at least 1 minute.
- If you are able to get to 20 reps with ease on the calf raise, try holding some weight to make things a little more difficult.
- Aim to do two consecutive days on the same intensity before increasing the difficulty (i.e. speed or weight), and only increase the difficulty by roughly 10%.
- You may find it helpful to do these exercises in a circuit type fashion, where you do exercise 1 for 1 set, followed by exercise 2 for 1 set, then exercise 3 for 1 set, followed by exercise 4 for 1 set, and then restarting.
At this stage you may be looking at returning to running. Follow our general Run/Walk Programme to help with this transition. If you get any ankle pain from running, it may be best to repeat a few more days or weeks of the exercises in this phase before re-attempting a return to sport. If however you get ankle pain after running, you may need to reduce the duration you are running and allow some time for the body to get used to this new activity.
Return to Sport or Activity
As a general rule, try and aim for two pain-free training sessions at a reduced duration or intensity before increasing.
For example, if you normally play 60 minutes of tennis, aim to play for 30 minutes in a non-competitive environment for two non-consecutive days.
Having a day's rest between sessions allows you to have appropriate rest and for your body to repair and become stronger.
Once you have found a duration or intensity you can tolerate with no flare up, aim to increase the next session by 10%. This can seem like a slow and conservative process however the research has shown this is the optimum level of increase to avoid an overuse injury. Increasing duration or intensity by more than 10% significantly increases your chance of injury, so only increase one or the other by this amount. As you will have been away from your sport for a number of months, you will have lost some of your fitness conditioning in this time and will need to build up slowly.
Over time you will be able to slowly return to your pre-injury level of activity without regressing back to any acute flare-up.