General Programme
Welcome to your free, general rehabilitation programme covering management and treatment options, exercises and equipment that could help. Scroll down to read more or use the sidebar icons to skip ahead.
Use our symptom checker for a more tailored rehabilitation programme.
Wrist Pain Management
Click each phase heading to see the progression of your management programme.
This phase is normally the first 24-72 hours after the event that triggered the pain and its aim is to settle any swelling and pain, whilst maintaining the range of motion and function you have and shows you how to cure wrist pain fast. You may find the steps in this phase not applicable depending on the level of movement and pain you have, or you may find only a number of points helpful in showing you how to fix wrist pain. If you have no swelling and full range of movement of the wrist in all directions, you could simply miss this step and start on Phase 2.

RICE
RICE stands for Rest, Ice, Compression and Elevation and is one of the simplest wrist pain treatments. These steps are helpful for when you have an injury in the acute phase to help reduce pain and assist with the healing process, however elements of it may also be helpful as a chronic wrist pain treatment option as well. Depending on your level of function you may not need to do the compression and elevation aspect of this treatment method as it may not offer any benefit, however the others should still offer some help in reducing your symptoms.
Rest: You need to reduce the activity level you are performing and let your body have time to heal. Doing too much initially won’t allow your wrist time to heal as quickly.
Ice: This can help reduce the pain you are experiencing and also reduce some of the swelling. Using some frozen peas wrapped in a damp cloth for 20 minutes will work well here and do this every hour or two. Do not apply the ice directly to your skin, make sure you have a barrier which is preferably damp, and keep an eye out for any ice burns on the skin. If you notice this stop immediately.
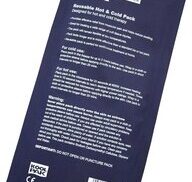
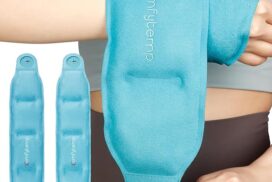
What can be helpful here is having a specifically designed ice pack you can reuse over and over again. You still need to have that damp cloth as a barrier with these packs as well.
Compression: This relates to the use of the ice being compressed onto the wrist. This can be achieved by simply wrapping a cloth around your joint, but more bespoke equipment offers this which would be more comfortable and effective, such as a wrist ice pack.
Elevation: Having your elbow rested on an object, with your wrist raised above your shoulder will help reduce any swelling in the area. This may help reduce some of the painful symptoms you are experiencing. Aim here for a similar time frame as applying ice and go for up to 20 minutes. If you are not experiencing any swelling then you can skip this part of the treatment. Do not compress and elevate at the same time, as the volume of fluid returning towards your heart may put too much pressure on it.
Medication
In the initial phase the use of over the counter medication may be an option. Medication such as paracetamol and ibuprofen may allow this acute phase to be more manageable. Please consult your family doctor if you have any concerns with this impacting your current medication, or if any medical history may be impacted by the option of including this medication.

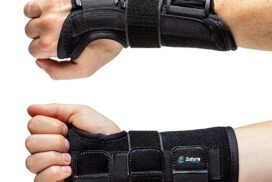
Brace
You may find it helpful to have the support of a basic wrist brace. You should only use this in the first few weeks and aim to wean off the brace gradually so that you don’t become too dependent on it. A brace can help transition as you begin to introduce your normal activities again. You don’t want to be wearing the brace when you are completing the exercises in Phase 2 as it will limit the range of movement you can produce. Although there is not one type which could be classed as the best brace for wrist pain, as this is specific to the individual and the injury they are experiencing.

Exercises
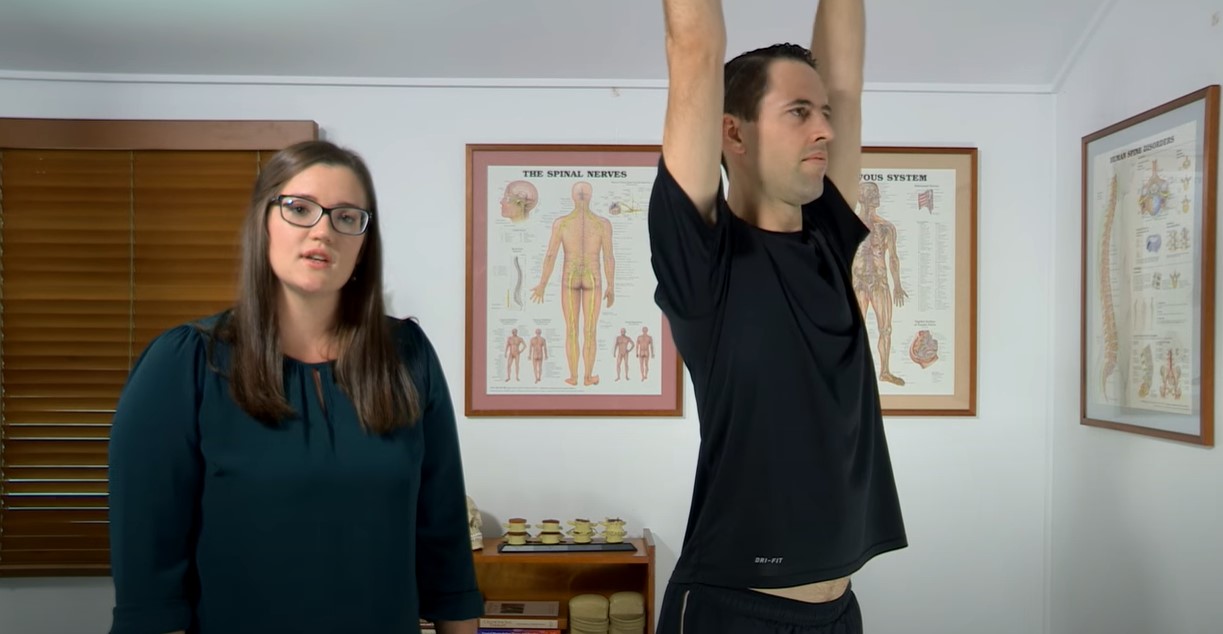
The aim of these exercises is to keep the joints above the wrist as mobile as possible, and encourage blood flow to and from the affected arm.
| Exercise | Frequency | |
| Shoulder Flexibility Exercises | 30 seconds x 2 sets | 5 x daily |
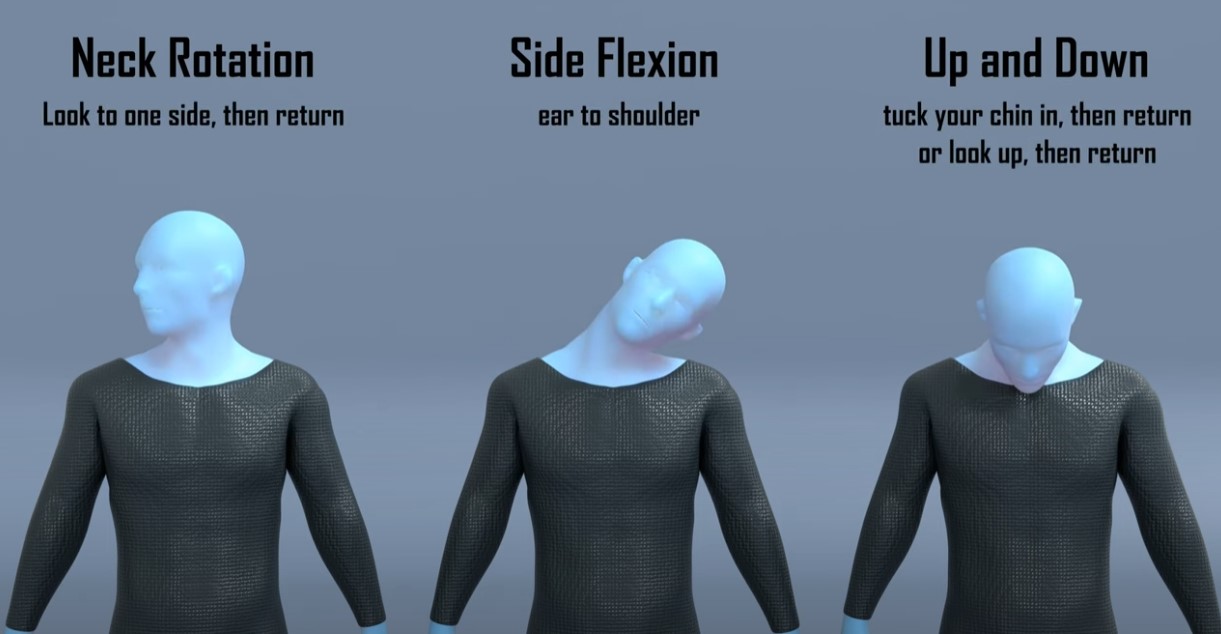
| Neck Active Range of Movement | 30 seconds x 2 sets | 5 x daily |
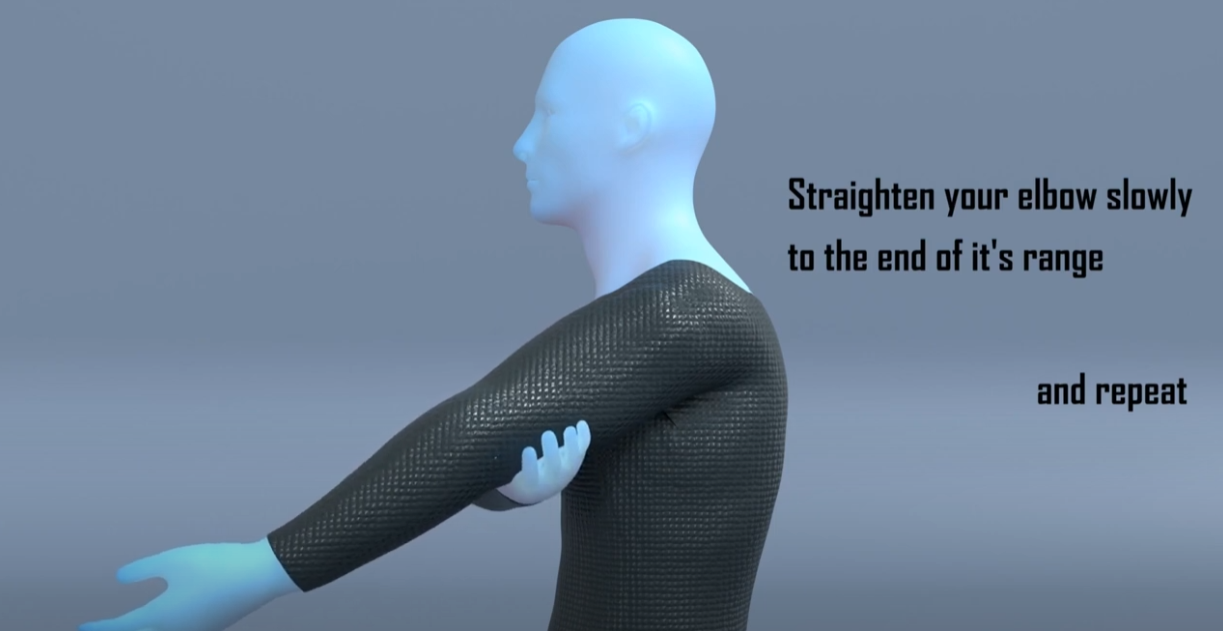
| Elbow Flexion and Extension Active Range of Movement | 30 seconds x 2 sets | 5 x daily |
You may find it helpful to do these exercises in a circuit type fashion, where you do exercise 1 for 1 set, followed by exercise 2 for 1 set, then exercise 3 for 1 set, follow this pattern until all the movements are completed, and then restarting.
This would be roughly the first 6 - 8 weeks of your recovery.

Education
The wrist provides the connection between your hand and your forearm. The wrist is made up of 8 small bones; the pisiform, triquetrum, lunate, scaphoid, hamate, capitate and trapezoid. Your forearm bones, the radius and ulna, are then connected to these bones. The wrist and forearm bones are given support by a number of ligaments. Ligaments are strong fibrous tissue which attach bone to bone. You then have a group of muscles on the front and back of your forearm which generate the movements of the wrist.
It would be reasonable to presume that one of the soft tissue structures in your wrist is causing you your symptoms of pain, and that by reducing your activity level will help these structures repair, and then you can build up the mobility and strength in these structures. If you are wondering how long does a sprained wrist take to heal, we are able to give you some guidelines on this to help you plan your recovery.
Soft tissue, such as muscles, tendon and ligaments, can take up to 12 weeks to repair themselves. You would expect a reasonable level of healing in the first 6-8 weeks following the initial injury. Whilst you are rehabilitating you need to be cautious not to overload your wrist and cause a spike in pain. Unfortunately you won’t get it right every time and some days or with certain activities will cause some discomfort, however as long as you don’t keep getting it wrong, and each week you are able to do more, then you are heading in the right direction.
The aim of this phase is to perform some basic wrist mobility exercises and low level strength exercises for the forearm muscles. The exercises here include stretches for wrist pain relief and shows you how to strengthen a weak wrist.
Generally people are focused on what flexion and extension their wrist can produce, however one movement which is equally important which people neglect is the rotation, called pronation and supination. Although this movement is actually generated from the bones at the top of your forearm, a wrist injury can cause this movement to be reduced due to lack of activity. This movement is used in a lot of daily activities when using your hand, and by not getting full range of movement initially can make certain movements more difficult in the future or perhaps painful, which is why it is one of the best exercises for wrist pain.
If you are experiencing wrist pain during push-ups or wrist pain after lifting weights, making sure you have full wrist mobility with these exercises may help reduce your wrist pain symptoms.
During this phase you can continue to practise the principles of RICE we discussed in Phase 1 to help alleviate any ongoing pain you may experience. However as the weeks go on you may find you need to do this less as the pain isn’t such a limiting factor.
A good marker of when to progress to Phase 3 is when you have at least 90% range of motion of the wrist compared to the other side, and the grip strength exercise doesn’t cause any pain and you have similar endurance to the other side.
Exercises
The aim of these exercises is to introduce some wrist mobility exercises, however start off slow and build up the range as the soft tissue structures around the joint will be damaged and excessively stretching them may cause some pain and delay healing.
| Exercise | Frequency | |
| Wrist Active Range of Movement | 30 seconds x 2 sets | 5 x daily |
| Grip Strength | 30 - 60 seconds x 2 sets | 5 x daily |
| Elbow Pronation and Supination Active Range of Movement | 30 seconds x 2 sets | 5 x daily |
- For the first exercise perform 30 seconds with each direction of movement. Start off gently to understand what mobility you can tolerate, and slowly increase it over the subsequent weeks. If you have wrist pain when bending the joint, focusing on this exercise should reduce your symptoms.
- For the grip strength exercise start off with the lightest putty or stress ball on the grip strength exercise. You may find that towards the end of the Phase you can introduce a Gyroball as a way to challenge you further, along with offering a more entertaining way to strengthen your forearm. This is a simple way to correct a weak grip.
- You may find it helpful to do these exercises in a circuit type fashion, where you do exercise 1 for 1 set, followed by exercise 2 for 1 set, then exercise 3 for 1 set, and then restarting.
Medication
In this phase you want to continue with any pain medications that are appropriate so that if you are experiencing any pain you are still able to do your rehab exercises, and also maintain a good level of quality sleep, however the general usage of the pain medication should be reduced as you move through the phase. By the end of this phase you should not be reliant on pain medication to get you through the day or to perform the exercises.
Brace
During the phase you should be weaning yourself off the brace reducing its usage throughout the day. By the end of this Phase you should not be reliant on the brace and be able to perform the exercises with ease.
Symptoms
During this phase you should start noticing more times in the day when you are pain free, however it is not uncommon for there to be sharp spikes in pain if you are doing a specific activity. This will improve and the activities which cause irritation should become less. If you continue to perform activities which consistently aggravate the wrist, it will continue to cause you pain and perhaps be affecting the end stage of healing. You need to alter the activities in some manner that are causing irritation until you have moved further along in your healing.
If you are struggling to wean off medication, perform the exercises without a spike in wrist pain, or have noticed wrist pain and numbness in fingers, this may be the marker of when to see a doctor for wrist pain, to make sure you are on the right path for your wrist pain treatment. If however you are improving and there has been significant improvement since you started the programme, this won’t be necessary.
In this phase we are looking between 6 to 12 weeks following the injury.
Education
Similar to Phase 2 the timelines here are merely a guideline and may vary depending on the severity of your sprain.
The aim of Phase 3 is to increase the strength exercises to the arm along with ensuring the range of motion is full. You should continue the two wrist mobility exercises from the previous phase making sure you get full range in all directions of the wrist joint. Hopefully by now we have shown you how to relieve wrist pain, but as there are many wrist pain causes, you may need to further strengthen and mobilise your wrist to return to full, pain free, activities.
You should notice that you are becoming less restricted in the day and able to perform more daily activities with ease. Your soft tissue structures are still healing during this period as well.
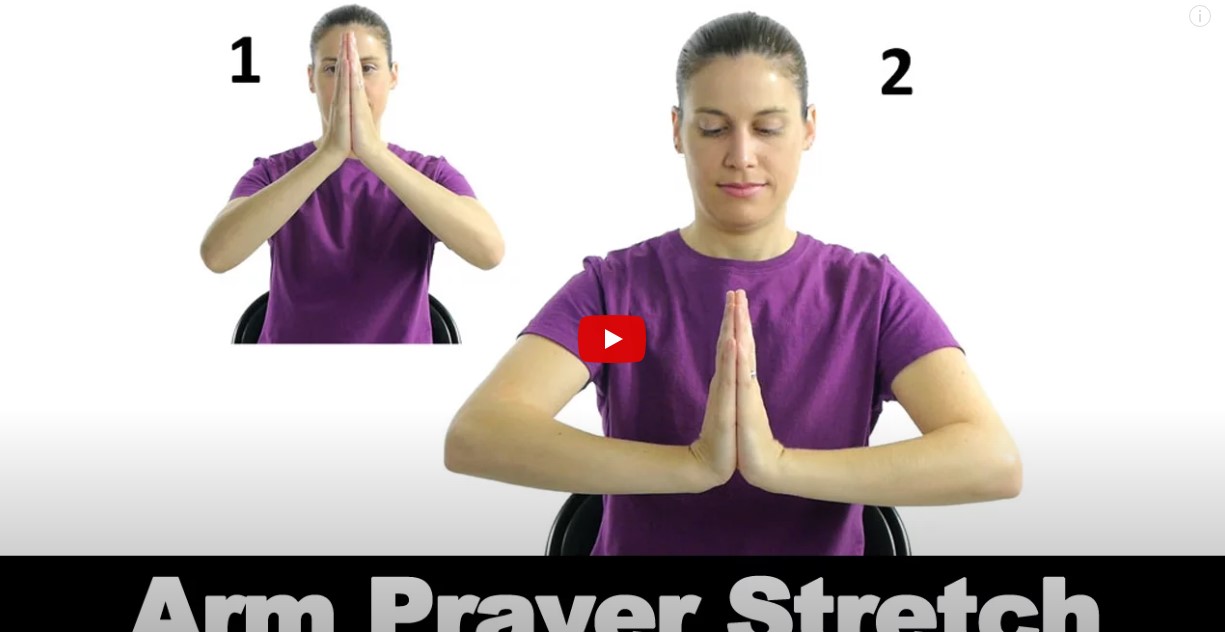
A good marker of when to progress from this stage is when the prayer stretches are equal on both sides.
Exercises
| Exercise | Frequency | |
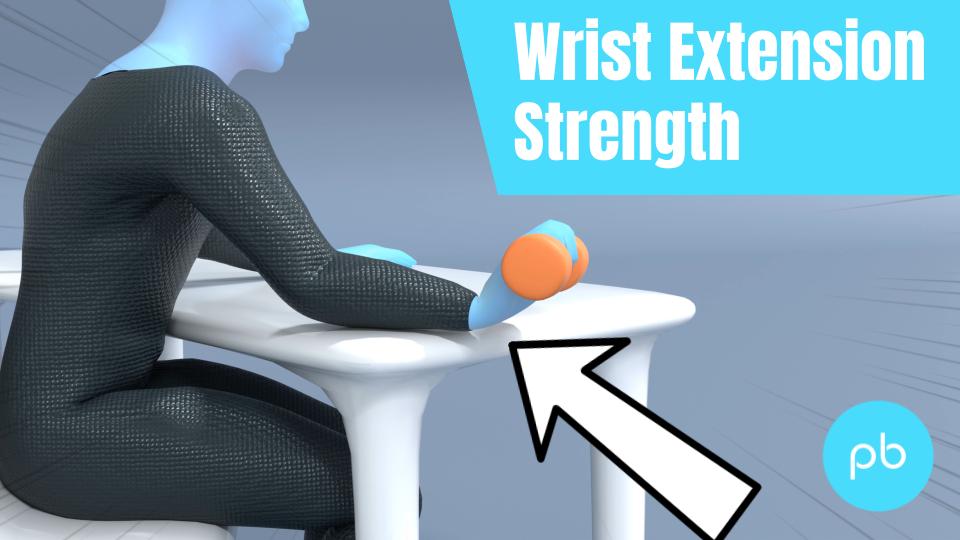
| Wrist Extension Strength | 8-10 reps x 3 sets | 3 x daily |
| Wrist Flexor Strength | 8-10 reps x 3 sets | 3 x daily |
| Wrist Extension Prayer Stretch | 60 seconds x 3 sets | 3 x daily |
| Pronation and Supination Strength | 60 seconds x 3 sets | 3 x daily |
| Wrist Flexion Reverse Prayer Stretch | 60 seconds x 3 sets | 3 x daily |
Some points to consider with the exercises:
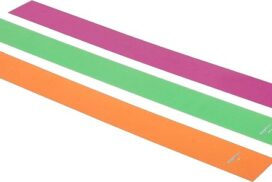
- For the wrist flexion and extension strength exercises you can use resistance bands, dumbbells, or simply a bottle or water.
- For the Prayer Stretch exercises start this slowly and increase the range of motion over time, you would expect this exercise to be discomforting to start with initially as you haven’t moved your wrist this far for a number of weeks.
- You may find it helpful to do these exercises in a circuit type fashion, where you do exercise 1 for 1 set, followed by exercise 2 for 1 set, then exercise 3 for 1 set, followed by exercise 4 for 1 set, and then restarting.
Strapping
One treatment option which may be helpful to be used in certain circumstances when you are perhaps performing certain activities or as you consider returning to any sport, is the use of strapping.
There are generally two types of tape which can be used, rigid or kinesiology.
Rigid tape as the name suggests doesn’t have any stretch in the tape, and is helpful in providing support to joints which are irritated. With this tape you shouldn’t keep it on longer than a day, and is normally best applied for a number of hours. If you have a skin reaction to the tape you should remove it immediately.
Kinesiology strapping is very popular for many musculoskeletal injuries and differs from rigid tape in that it stretches with the movement of the joint where it is applied. The idea is that the tape helps support the soft tissue and joint at the point of pain, and therefore causes less pain when doing exercises or general daily activities. You can leave this tape on for up to 5-7 days but at any point if it feels hot and itchy take it off straight away. Have a day's rest of no tape before reapplying, and ideally test with a small strip before applying a big amount to you.
This is an example of a simple general wrist strapping technique you could use with either rigid or kinesiology tape which will offer support to the joint, which can show you how to wrap a sprained wrist, and may be helpful if there are certain work or sporting activities you need to perform but are struggling to adapt.
Symptoms
You should in this stage not be noticing your wrist pain with daily activities, unless it is being pushed into the end range of flexion and extension. You should also notice that your endurance with any activities or hobbies you do using your wrist becomes greater as your strength improves. If you still are experiencing a sharp pain in wrist when moving the joint, it may be helpful to be reviewed face-to-face by a medical professional.
Pacing
At this stage you should find you can do more day-to-day activities pain free. The temptation here is to go a bit overboard. A nice reminder to pace activities so that you don’t over do it, and that you spread these activities out as much as possible throughout the day.
This final phase is from the 3 month mark onwards. Your wrist will still be progressing during this time and may require this long depending on your goal.
When you start Phase 4 you want to have achieved a full range of movement, or at least 90% compared to the other side, and find the grip strength exercises not too challenging. For some people there may not be any requirement to perform these exercises, however if you intend to return to sport it may be helpful.
You may find continuing the exercises from Phase 3 helpful, especially if there are any movements which remain tight.
The main focus on Phase 4 is to increase the strength work of the wrist in a more dynamic manner, along with introducing some weight bearing exercises.
Exercises
| Exercise | Frequency | |
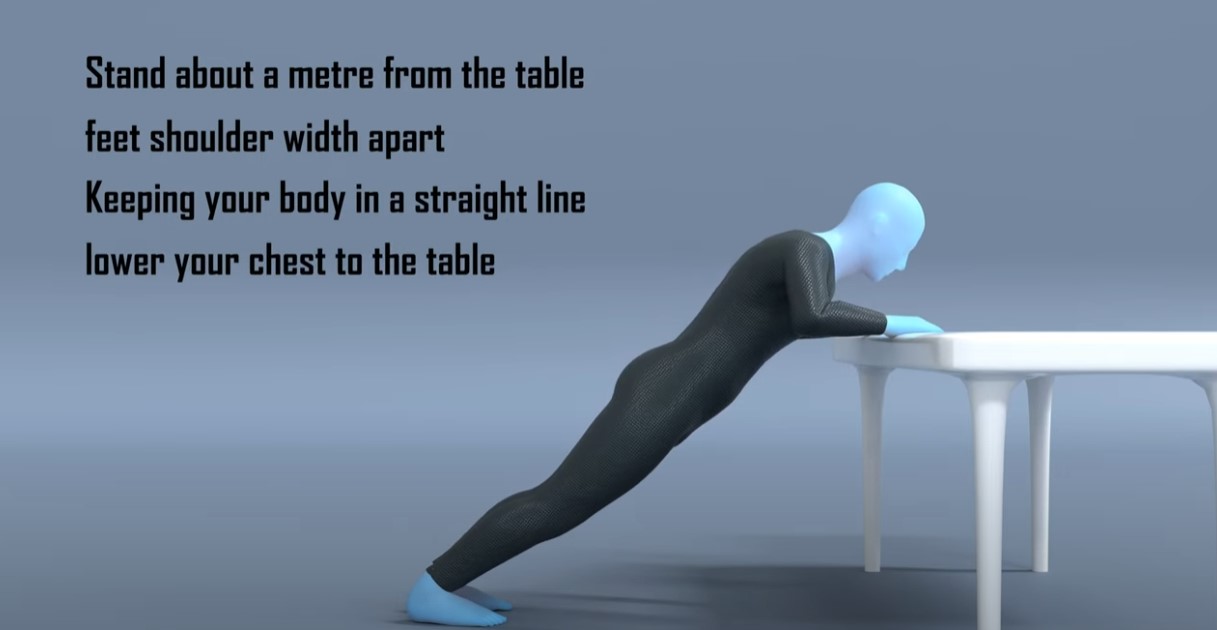
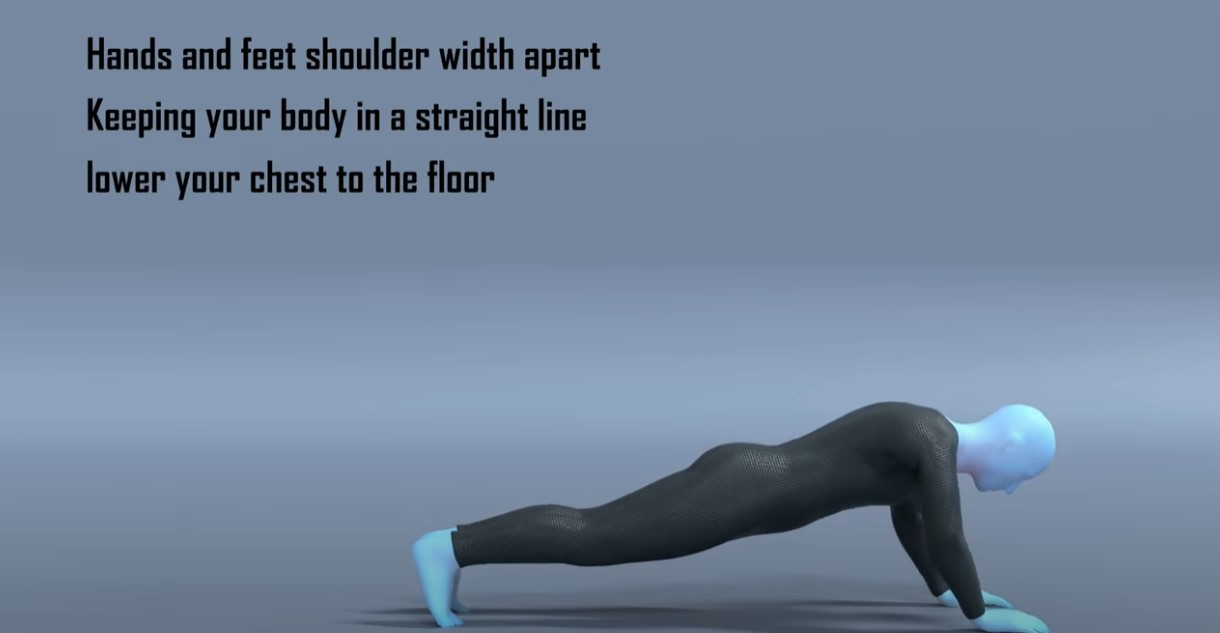
| Press ups (on a wall, table or floor) | 8-15 reps x 4 sets | 2 x daily |
| Bicep Curls | 8-15 reps x 4 sets | 2 x daily |
| Resistance Band Rows | 15-20 reps x 4 sets | 2 x daily |
Some points to consider with the exercises:
- On the press ups start with the easiest option and then progress upwards after 1 week. If you struggle with the Prayer Stretch from the previous phase then you should not try to press ups just yet, as the extra weight through your joint without having full range will be too tough initially.
- For the bicep curls you can use dumbbells or resistance bands.
- With all three exercises vary the position you have your wrist to offer some variation.
- Aim to do two consecutive days on the same intensity before increasing the difficulty, and only increase the difficulty by roughly 10%.
- As you are able to tolerate more weight or resistance you can reduce the repetitions on each of these exercises.
- You may find it helpful to do these exercises in a circuit type fashion, where you do exercise 1 for 1 set, followed by exercise 2 for 1 set, then exercise 3 for 1 set, and then restarting.
Return to Sport or Activity
As a general rule, try and aim for two pain-free sessions at a reduced duration or intensity before increasing.
For example, if you normally play 60 minutes of tennis, aim to play for 30 minutes in a non-competitive environment for two non-consecutive days.
Having a day's rest between sessions allows you to have appropriate rest and for your body to repair and become stronger.
Once you have found a duration or intensity you can tolerate with no flare up, aim to increase the next session by 10%. This can seem like a slow and conservative process however the research has shown this is the optimum level of increase to avoid an overuse injury. Increasing duration or intensity by more than 10% significantly increases your chance of injury. As you will have been away from your sport for a number of months, you will have lost some of your fitness conditioning in this time and will need to build this up slowly.
Over time you will be able to slowly return to your pre-injury level of activity without regressing back to any acute flare-up